Pages

.


.


Gluten Free Cowboy Cookies

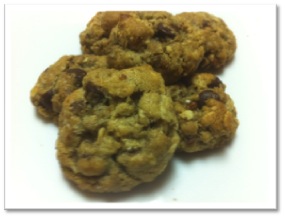
I received this recipe attached to a gift jar at a holiday exchange.  We are Gluten Free so we could not use the blend provided. Looking at that jar on my counter and not being able to try that cookie was taunting me!  LOL.  I decided to try the recipe out with my favorite gluten free flour blend. They turned out wonderfully!!!!  I am so pleased at how nicely the cookie recipes are converting to Gluten Free.

This was my first time having a chocolate chip in a cookie with oats. The combination of oats and chocolate chips was just heavenly.  I always heard of making oatmeal cookies with chocolate chips instead of raisins but never ever tried them that way.  I think these are called cowboy cookies because the turn out to be a hearty cookie.  Just what you would expect a cowboy to eat.


1/2 cup Butter (room temperature)
2 Eggs
1 teaspoon Vanilla

1 1/2 cups Flour Blend
1/2 teaspoon Xanthan Gum
1 1/3 cups rolled oats (make sure they are labeled GF)
1/2 cup packed brown sugar
1/2 cup white sugar
1/2 cup chopped pecans
1 cup semisweet chocolate chips
1 teaspoon baking powder
1 teaspoon baking soda
1/4 teaspoon salt

1. Preheat oven to 350 degrees and line cookie sheets with or parchment paper.
2. In a medium bowl, mix together 1/2 cup butter , 2 eggs, and 1 teaspoon of vanilla.
3. Stir in the remaining ingredients. You may need to use your hands to finish mixing.
4. Shape into walnut sized balls.
5. Place 2 inches apart on prepared cookie sheets.
6. Bake for 11 to 13 minutes in the preheated oven.


reade more... Résuméabuiyad

Taco Seasoning Blend

Make your own Taco Seasoning blend!


I have tried so many different variations of this recipe over the years. I was trying to find one that tastes like the ones you buy already mixed in the packet at the store.  So many times I have been disappointed.  There were some good ones though, like Alton's Taco Potion #19.  But it just was not what I personally was looking for.  This recipe below is what I believe is the closest thing to the packets I am used to.  


It is so economical to make it yourself.  I have not done the math yet, but the cost is bound to be cheaper.  My mother's dollar stores carry all of these ingredients.  So seven dollars for seven ingredients equals seven packets of the store bought stuff.  Or make it yourself and get way more than seven packets.  
1 Tablespoon minced dried onion
2 teaspoon chili powder
1 teaspoon salt
1 teaspoon garlic powder
1 teaspoon corn starch
1 teaspoon cumin
1 teaspoon paprika
1/2 teaspoon cayenne pepper 


Get out 10 little snack sized baggies.  
Add each ingredient above one at a time to each bag.
Store for later.


Note:  I personally do not add water to the beef along with the spice.  I think the beef releases enough juices to use and it makes a thicker coating.  My kids hate runny taco meat!


reade more... Résuméabuiyad

Skin MD Winner


The winner is Throuthehaze.  Congratulations.
reade more... Résuméabuiyad

Soft Cake Like Sugar Cookies

These cookies are soft and yummy.  My one biggest challenge of baking gluten free cookies was  making my sugar cookies so they did not get too crunchy.  I actually took a poll on my Facebook page to see what the most popular preference was.  It was chewy by a landslide.

Problem #1:
Every gluten free cookie and gluten free sugar cookie recipe I tried to date resulted in a crunchy cookie.  Like ginger snap type crunch.  They were good tasting cookies but I'm on team chewy cookie!!!

Problem #2:
I need them to end up resembling the shape I am cutting them into (for the kids sake) and not result into a soft puffy blob (which are good to eat, but not to decorate).

I decided to go a different route in my pursuit of a good sugar cookie and use a regular gluten filled recipe instead and use some of the tips I looked up in the back of my cook books.  I started with the recipe that came with the cookie cutter I ordered from CopperGifts.com.

I used a sword cookie cutter in honor of my son's Black Belt Birthday.  By frosting these cookies with a Royal Frosting, they allowed this larger sized cookie to be more stable and not fall apart during transport.  I gave these as hand outs at my son's birthday.  I simply placed them in a Cello bag decorated with a nice ribbon.  They were a HIT!

Below you will find the recipe I ended up with.


21 ounce Vanilla Cake Mix (I used this because I had tons of it)
1/4 cup Additional Flour Blend
1 cup Butter flavored Crisco
1/2 cup Butter, room temperature
1/4 cup Sugar
2 Whole Eggs
1 Egg Yolk
1 teaspoon Vanilla
1 teaspoon Baking Powder
1/2 teaspoon Salt

  • Gently mix butter and sugar, beating until light and creamy.
  • Beat in eggs and vanilla.
  • Add baking powder to cake mix and add 1 cup at a time.
  • Beat until completely blended.
  • Divide dough in half.
  • Roll out cookie dough between 2 sheets of parchment paper. 
  • Use a rolling pin (with spacer rings if you have it to get perfect spacing) roll out to 1/4 inch thick layers.
  • Continue rolling remaining dough between parchment paper.
  • Place in stacks on a cookie sheet, cover with foil.  
  • Chill dough overnight or 1 to 2 hours at a minimum.
  • Remove one sheet of the dough at a time and cut into shapes.
  • Bake on baking sheet at 350 degrees for 10 to 12 minutes and edges start to brown slightly.
  • Makes a dozen cookies

And because my sole purpose in life is to save you from having the aggravation of trying to figure this out for yourself like I did, here are some hints and some trouble shooting techniques for cookies that I found from various sources, including Joy of Baking. The tips below will help you achieve the cookie YOU desire.

Flat
If you want your cookies on the flat side, you can do some or all of the following things: Use all butter, use all-purpose flour or bread flour, increase the sugar content slightly, add a bit of liquid to your dough, and or bring the dough to room temperature before baking.

Puffy
If you like your cookies light and puffy, try some of the following tricks. Use shortening or margarine and cut back on the fat, add an egg, cut back on the sugar, use cake flour or pastry flour, use baking powder instead of baking soda, refrigerate your dough before baking.

Chewy
If chewiness is your desire remove the cookies a few minutes before they are done, while their centers are still soft and not quite cooked through. The edges should be slightly golden but the middle will still look slightly raw. Use brown sugar or honey as a sweetener. Try using egg yolks instead of whole eggs. This will add some extra moistness to the cookies thus helping to be a bit more on the chewy side.

Crispy
For crisp and crunchy cookies, bake your cookies a few minutes longer than suggested and immediately remove them to a wire rack to cool. Cookies made with all butter and high amounts of white sugar will also crisp quite nicely. Another trick is to use bread flour.

Common Cookie Problems

Cookies brown too quickly 
The oven is too hot or baking pans are a dark color. Try baking at a lower temperature, longer or use heavy gauge aluminum baking sheets.

Bottom of cookies brown too quickly
Same as above, or the oven rack is too low, or too much sugar is in the cookies.

Top of cookies brown too quickly and bottoms are not cooked
The rack is too high in the oven

Cookies spread too much
The dough is too soft - refrigerate for 15 minutes; warm baking sheets were used; too much butter, oil, or margarine was used - try using a 50/50 mix of shortening and butter.

Cookies do not bake evenly
Your cookie sheet may be warped or the temperature throughout the oven is not even.
reade more... Résuméabuiyad

Gluten Free Dump Cake

This is a great idea for a pot luck or a dish to take along to a dinner you were invited to. It is called a Dump Cake but it really turns out more like a Gluten Free ~ Worry Free Cobbler.  Either way, its delicious.  I was suggested to try this idea from a few commenters on my Betty Crocker Ideas post and am I ever grateful.  The beauty of this recipe is that it applies to both regular cake mix as well as Gluten Free.


1 Box Cake Mix (I used Betty Crocker Gluten Free Yellow Cake Mix)
1 Can Cherry Pie Filling 
1 Can Crushed Pineapples (with Juice)
1 Cup (2 sticks) Butter, Melted
Sprinkle of Walnuts

  • Dump Cherry Pie filling into a 9 x 13 Baking Dish.
  • Dump evenly over top of that the Pineapples.
  • Sprinkle some Walnuts on top.
  • Layer an even coat of the Cake mix on top.
  • Layer melted butter evenly over top.
  • Bake 350 degrees for one hour.
reade more... Résuméabuiyad

Menu Plan Monday: Week of December 6th, 2010


I actually was walking around Sam's Club this week and found some awesome deals on chicken.  It was stamped, "Reduced for Quick sale".  It was not expired meat, just nearing that point.  For a dollar a pound, I purchased LOTS of breast and tenders.  So in honor of a great deal, it is chicken week!

Monday:

Tuesday:

Wednesday:
Church

Thursday:
Surprise Chicken Dish (to be announced)

Friday:
Pizza Inn

Saturday:
Creamy Kielbasa Bean Soup with fresh baked  bread and a side of salad.
Recipe to follow.

Sunday:
Turkey Dinner 
Forgot to defrost the turkey last time ~ LOL.


reade more... Résuméabuiyad

Cinnamon Tree Ornaments

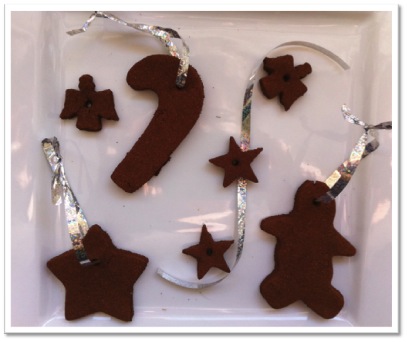
They look like cookies, but they are not edible.  So please don't eat them ~ lol!!!

My son asked me to make these for the little tree he has in his room.  My children just love the smell that lingers the whole holiday though.  I love to add them to packages and use as gifts to those I would like to remember this holiday season.


1 cup Cinnamon
1/4 cup Apple Sauce (any)
1/4 cup Glue (I used Elmers or Tacky Glue)

  • Preheat oven to 200 degrees.
  • Mix all ingredients in a mixing bowl until the dough is smooth and holds together well.
  • If the dough is too sticky, add a little more cinnamon.
  • If the dough is too crumbly, add a little more applesauce (water works fine too).
  • Roll the dough out between two sheets of waxed paper until it is 1/4″ thick.
  • Cut dough into desired shapes.
  • Make a hole at the top of the Ornament with a drinking straw or skewer.
  • Place on baking sheet on parchment paper and bake for 2 hours.
  • Cool on wire rack.
  • Insert ribbon and hang on your tree.
reade more... Résuméabuiyad