Pages

.


.


Showing posts with label Bread. Show all posts

My Kitchen Aid Mixer For Bread

When I first started making the bread recipe that came down from my grandmother, I made it true to the recipe. Back in the 1970s I had nothing to facilitate bread making but my two hands. I made bread that way for many long years, until I got my Kitchen Aid. I avoided getting a Kitchen Aid mixer for a long time, feeling I didn't need it, but once I got one, it changed my life, and the way I made bread.

At the time I got the Kitchen Aid, I had reduced the size of the bread recipe to make only the 2 loaves that a bread making machine could handle. The bread machine was literally used to its death, and when the Kitchen Aid mixer came into my life, it was a love affair. I started making the whole bread recipe with the original ingredients, but some things just seemed to lend themselves to change. I switched from scalding milk to using just hot water and mixing powdered milk into the initial flour mixture. I changed using sugar to using honey. Then Bread Flours came on the market, with the higher gluten content and that was another change. There is little difference in the flavor of the outcome. This is my recipe.

My Kitchen Aid Mixer Bread

1 1/2 cups boiling water

1 stick unsalted butter

2 1/2 teaspoons salt

1/2 cup honey

2 cups bread flour

1 cup powdered milk

2 packets of Rapid Rise or Instant Yeast

1 1/2 cups cool water

3 eggs

6 cups additional bread flour, plus more for dusting

Place the first four ingredients in the bowl of a Kitchen Aid or other large, heavy duty mixer. Allow the butter to melt and the water to cool to lukewarm, about 1/2 hour to 45 minutes. (I usually start this before breakfast, then eat and get back to the bread once I am done eating.) In a small bowl combine the 2 cups of flour, powdered milk and yeast and stir to combine. When the mixture in the mixer bowl has cooled, add in the other 1 1/2 cups cool water and the flour, milk and yeast mixture. Attach the dough hook and set the mixer to the lowest setting to combine. Set the mixer to the next higher setting and add in the eggs, allowing them to be completely incorporated. Add in 5 cups of flour, one cup at a time, allowing most of one cup to be incorporated before adding the next. For the last cup of flour, watch carefully. If the dough begins to crawl up the dough hook, it has too much flour. If it puddles without shape, there is still too little. Depending on the type of flour and the ambient humidity, you may need more than 8 total cups of flour, or less.

Once the proper amount of flour is incorporated, allow the mixer to run, kneading the bread for another 8 to 10 minutes. At this point, stop the mixer, lower the bowl (or raise the top), remove the dough hook and allow the bread to rise for about 1 1/2 to 2 hours, until it has doubled in size.

Once dough has risen, generously flour a work surface and turn out the bread. Fold it back and forth over on itself to expel large air pockets.

Grease or spray with cooking spray 4 medium loaf pans about 4 x 8 inches. Divide the dough into 4 equal portions. With one portion, flatten it well with your hands, and begin tucking and rolling it into a log. The edges need to be tucked in and under to create an even log shape. Place in one of the prepared pans and repeat with the other 3 sections of dough. Set pans of dough aside to rise in a warm area for 1/2 hour to 45 minutes, or until doubled in size.

Preheat oven to 350 degrees. Place pans in oven to bake for approximately 30 minutes, until nicely golden. Turn out of pans onto counter or racks to cool. The loaves should sound hollow when tapped on the bottom.

When my children were younger, one loaf would be devoured before it had a chance to totally cool. Still, with three extra loaves, what to do? They freeze exceptionally well. When a loaf is needed, remove from freezer and allow it to thaw naturally. If you are in a hurry, one minute in the microwave will thaw it enough to be able to slice. Make this bread and enjoy it.

Chris Rawstern Photo My name is Chris Rawstern and I have been on a cooking and baking journey for 42 years. Many people have asked what A Harmony of Flavors means. Have you ever had a meal where the visual presentation was stunning, the smells were incredible, the taste was so remarkable that you ate slowly savoring every bite, wishing the experience would never end? Then you have experienced what a truly harmonious meal can be like. My passion is to teach people how to create a Harmony of Flavors with their cooking, and help pass along my love and joy of food, both simple and exotic, plain or fancy. I continue my journey in ethnic and domestic cuisines, trying new things. I would love to hear from you, to help me continue my journey to explore diverse culinary experiences and hopefully to start you on a journey of your own. Visit my Web site http://www.aharmonyofflavors.com/ my Blog my Marketplace or Facebook page A Harmony of Flavors.
reade more... Résuméabuiyad

Variations on a Bread Making Theme

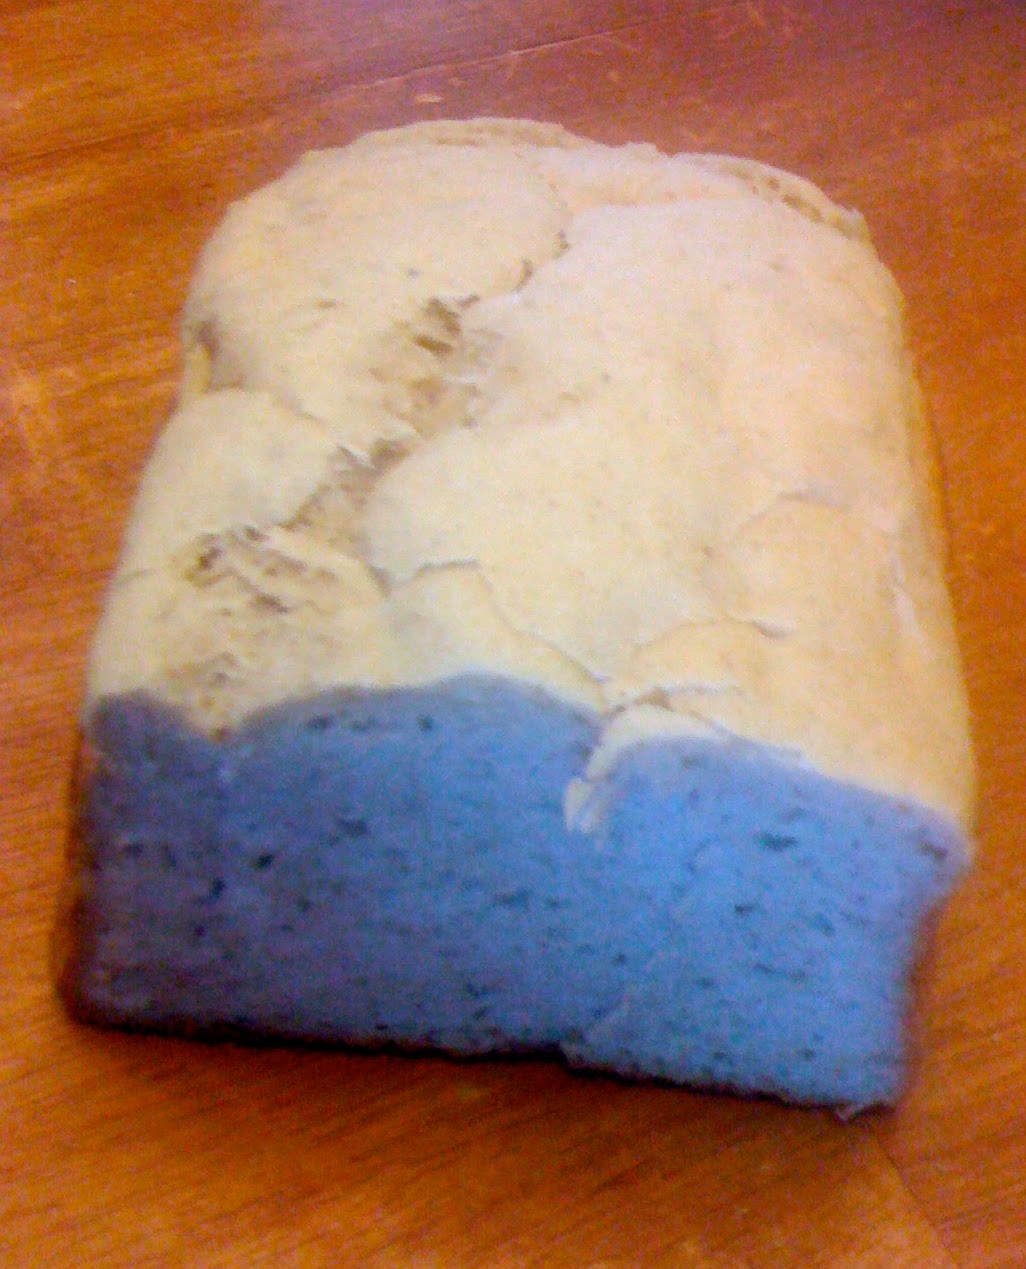
You know how sometimes even the best cook can get distracted and forget an ingredient? That happened to me once many years back, and I completely forgot to put in the 3 eggs called for in my bread recipe. I was so distracted that even when I had only added 7 cups of flour and the dough already looked too dry, I still didn't realize what was wrong. I made the bread, baked it and we were eating the first loaf. There was a difference in color that I wondered about. That was when I realized that I had utterly forgotten to add the eggs.

Things like this can happen to the best of us, but what I want to demonstrate with this story is that bread making is a forgiving art. Add a little more of this, a little less of that, and you still have a very good loaf of bread. After that episode of forgetfulness, I got thinking. I tried making the bread with only a half stick of butter and two eggs. It turned out great. I substituted 2 cups whole wheat flour for part of the flour and it was great. I wondered what other things I could do with this original recipe.

Remember that when making a substitution or using a different ingredient, the total amount of flour needed will vary. If substituting 2 cups of whole wheat flour, do this at the beginning of the recipe. This way, toward the end of adding flour, you will know that since whole wheat is a thirstier flour, you will likely need less than the full amount. This holds equally true with flax seed. I often mix 1 cup of ground flax seed into the original 2 cups of flour, mixed with the powdered milk and yeast and add it at the beginning. Flax seed soaks up liquid, so the ultimate amount of flour will be less by nearly a cup.

Another variation I use often is with oatmeal. When the boiled water is poured over the stick of butter, honey and salt, I add in a cup or so of old fashioned rolled oats to the hot liquid to soak. Once cooled enough, proceed with the recipe as stated, knowing you will need less flour than called for. Keep an eye on the texture of the dough, noting that if the dough starts trying to climb up the dough hook, it is more dry than needed. Softer dough will yield more tender bread.

If you like nuts, such as walnuts or pecans, they can be added either finely ground or coarsely chopped, as desired. The amount of flour should not vary widely with the addition of nuts. Use raisins the same way, for that variation. For cinnamon raisin bread, when patting out one loaf of dough, and prior to rolling up, brush the dough with melted butter and sprinkle with cinnamon, or cinnamon and sugar. If raisins have not been added to the dough itself, they may be sprinkled on before rolling up the loaf.

If you choose a less sweet dough, lower the amount of honey by half, and add in another half cup of water, to keep the amount of dough approximately the same. If you want to use only egg whites instead of whole eggs, that is acceptable. If you have leftover egg yolks and need to use them, just yolks in the recipe will work fine. Either way, remember that slightly less liquid is being used, so either compensate by adding a little more water or a little less overall flour. Eggs, either whole or just the yolks give the bread a lovely golden color. If you want to increase the golden color even more, use saffron. Take a pinch of saffron and either grind to a fine powder or crumble finely and add to the boiling water at the beginning of the recipe. Alternatively, soak the saffron threads in the boiled water, then remove the threads before pouring into the mixer bowl.

If you want to make dinner rolls such as cloverleaf, one loaf of dough will yield a dozen rolls, made in greased muffin tins. Baking time is approximately 12 to 15 minutes. If you would like to make buns, one loaf will make about 6 to 8 buns. Divide one loaf worth of dough into the appropriate amount of equal sized pieces. Take one piece and make a nicely formed ball by tucking under repeatedly. Then either with hands or a rolling pin flatten the dough to an exaggeratedly wide and flat round. It may take some work. Lay these onto a greased baking sheet and allow it to rise. Bake for about 15 to 18 minutes.

These are some of the many ways to make changes and alterations. Get familiar with the dough and how it works and there is no limit to what can be done.

Thank you for taking the time to read my article. I hope it was informative and helped you along your own culinary journey. You will find many more recipes and helpful tips on my web site. I am on Facebook at A Harmony of Flavors and share a recipe or tip each day to the fans that have liked my site. I hope to see you there soon.

Chris Rawstern Photo My name is Chris Rawstern and I have been on a cooking and baking journey for 42 years. Many people have asked what A Harmony of Flavors means. Have you ever had a meal where the visual presentation was stunning, the smells were incredible, the taste was so remarkable that you ate slowly savoring every bite, wishing the experience would never end? Then you have experienced what a truly harmonious meal can be like. My passion is to teach people how to create a Harmony of Flavors with their cooking, and help pass along my love and joy of food, both simple and exotic, plain or fancy. I continue my journey in ethnic and domestic cuisines, trying new things. I would love to hear from you, to help me continue my journey to explore diverse culinary experiences and hopefully to start you on a journey of your own. Visit my Web site http://www.aharmonyofflavors.com/ my Blog my Marketplace or Facebook page A Harmony of Flavors
reade more... Résuméabuiyad

My Bread Making Tradition, My Mothers Recipe

By now I am sure you have read a lot about the theory of making good bread from scratch. Start with a recipe that I have been using for the last 40 years and enjoy your results. I had to learn to make bread at age 21, in a foreign country, without an oven. With all the modern conveniences today, bread making is a snap. It is my recommendation that it be made completely by hand at first so the look and feel of the dough becomes known. Later on, using a machine or mixer, you will understand better what you are seeing, and instinctively know how to correct, if things go awry.

My Mom's Bread Recipe

3 cups milk, scalded (just when tiny bubbles start forming at the edge of the pan)

1 stick unsalted butter

1/2 cup sugar

4 cups bread flour

2 - 3 teaspoons salt

2 packets Instant Rise or Rapid Rise yeast

3 eggs

4 cups more flour, or more, as needed

In a saucepan, scald the milk. Once the tiny bubbles begin, remove from the heat and put in the stick of butter and the sugar. Allow the milk to cool and the butter to melt or soften until a pinkie finger inserted into the milk will not feel hot. In a very large bowl, place the flour, salt and yeast and stir to combine. Add in the lukewarm milk mixture and stir with a wooden spoon. Add in the eggs, beating well after each addition. Begin adding in more flour, a cup at a time. Once it is too difficult to stir with the spoon, use hands and continue mixing. Once 7 1/2 cups of flour are incorporated, begin counting the 10 to 12 minutes of kneading time.

The bread may be turned out to be kneaded on a floured surface. This allows for two hands to be used, making it easier, but also

affords the possibility of adding too much more flour. The bread should be smooth and elastic after the kneading period. Adding too much flour will toughen the dough unnecessarily. Kneading is nothing more than manipulating the dough, by pushing it with the heels of the hands, flipping, rotating and pushing some more. If the dough is left in the bowl, there is no need for too much more flour to be added, but requires one hand to do all the kneading. Lift the dough, pulling and twisting, press back down, pull and twist and continue until the 10 to 12 minutes have elapsed. Set the bowl aside is a warm place to rise until about doubled in size.

Grease 4 medium loaf pans, about 4 x 8 inches. Turn the dough out onto a floured surface and knead gently to remove the large air pockets. Divide the dough in 4 sections. Press one section flat; beginning at one end, roll the dough into a log, tucking ends and edges as necessary. Place into one of the prepared pans; repeat with the other three sections of dough. Set the pans aside to rise in a nice warm area of the kitchen. It will take 30 to 45 minutes. Just as the dough is above the edge of the pan height, preheat the oven to 350 degrees. When the oven is hot, put the pans in and time for 30 minutes.

The finished loaves should have a hollow sound when tapped on the bottom, once turned out of the pan. All ovens vary. If you have convection, I recommend using it, setting the oven at 325. Convection, which blows the heated air, bakes more quickly and efficiently. In my present oven, the bread takes 28 minutes to come out perfectly, and not too dry. Learn your oven.

It is best to wait until the bread is cool to slice, though the temptation to cut immediately is great. My Mom always cut the heel off, buttered it still steaming, and let us all have a bite. Complete nirvana. Do try this out. I guarantee the satisfaction is well worth the time. The loaves can easily be frozen until needed. Remember: this is homemade, with no preservatives. These loaves will not last a week on the counter. But then, one of these loaves rarely lasts a day or two.

Thank you for taking the time to read my article. I hope it was informative and helped you along your own culinary journey. You will find many more recipes and helpful tips on my web site. I am on Facebook at A Harmony of Flavors and share a recipe or tip each day to the fans that have liked my site. I hope to see you there soon.

Chris Rawstern Photo My name is Chris Rawstern and I have been on a cooking and baking journey for 42 years. Many people have asked what A Harmony of Flavors means. Have you ever had a meal where the visual presentation was stunning, the smells were incredible, the taste was so remarkable that you ate slowly savoring every bite, wishing the experience would never end? Then you have experienced what a truly harmonious meal can be like. My passion is to teach people how to create a Harmony of Flavors with their cooking, and help pass along my love and joy of food, both simple and exotic, plain or fancy. I continue my journey in ethnic and domestic cuisines, trying new things. I would love to hear from you, to help me continue my journey to explore diverse culinary experiences and hopefully to start you on a journey of your own. Visit my Web site http://www.aharmonyofflavors.com/ my Blog my Marketplace or Facebook page A Harmony of Flavors.
reade more... Résuméabuiyad

Gluten Free Honey and Oat Bread

Brown Bread

I suppose most of my readers know by now that I like to use oats.  I put oats in my meatloaf, I use them to bread my chicken.  My cholesterol runs high so that is something I have just gotten used to since pre Celiac Diagnosis.  Oats are the first thing they tell you to add to your diet for good health. So I guess its no big surprise that I eventually put it in my bread. 

The bread I use most of the time is my Udi's copycat recipe. The copycat recipe looks and has the softness of a Wonder bread type product which my children love.  It is also a wonderful transition bread for those newly diagnosed because it most closely resembles the bread folks knew while eating gluten.  But as timie goes along, some of us may long for that brown bread back.  I used to be a whole wheat bread eater.  Not the dense coarse type, regular bread only brown.  I started with the Udi's copycat recipe I currently use, I toyed with it to create a gluten free Brown Bread.  I started with that recipe in its entirety and then halfed it and chaged the half ingredients up.  I dare not call it Whole Grain....LOL.  It does has some grain and fiber, but it still has plenty of starches.

Want to know a secret?  I used only egg whites in the first place becuase the yolk would make the bread look off color. Upon initial diagnosis with my daughter I was looking for "white" bread not yellow, cream or brownish bread.  That just reminded her that what she was eating was "diffrerent". Now if you ask her, she will gladly tell you...."Mommy makes the best bread ever". (Awh shucks)!  SOoooo........I am using the whole egg in this recipe as well. I switched one of the eggs and replaced it with flax meal.  The very first gluten free mommy I spoke to told me once to add flax to everything, it could not hurt.  At the time I had no idea what she was talking about nor why she would say this.  NOW (of course) I do.  ;-)

The taste and texture is so nice and soft.  The bread has a bit of chewyness but not too much.The honey gives it a lovely sweetness to offset the oats.  This is a very nice and enjoyable bread that gives you a warm comfortable feeling in your belly.  You can put your mind is at ease knowing that there is lots of good stuff in this bread.

Pictured here is a dinner roll ripped in half

1 cup Warm Boiled Water (110 degrees)
1/4 cup Honey
1 Tablespoon plus 1 teaspoon Yeast
1 Tablespoon Milled Flax Seed
3 Tablespoons Water
1/4 cup Oil
2 Whole Eggs
1 teaspoon Vinegar
2 cups Gluten Free Flour Blend
1 cup Quick Cooking Oats (pureed to a rough flour, see picture)
2 1/2 teaspoons Xanthan Gum
1-1/2 teaspoons Salt
1-1/2 teaspoons Baking Powder

Spray 9 x 5 baking pan with oil
Preheat oven to 170 degrees and turn oven off.
  • Place water on your stove to Boil.
  • Take a 2 cup capacity measuring cup and add One cup of warm tap water (cooled to almost exactly 110 degrees, you will need your thermometor for this).
  • Add  honey and stir to dissolve.  This will help cool the water a bit.
  • Add yeast, stir to dissolve and set aside to allow the foam to develop on top.
  • Meanwhile Add Milled Flax and 3 Tablespoons of water in a small bowl.  Stir to fully combine and set aside. 
  • Add Oil, vinegar and Eggs to mixing bowl with whip attachment and mix until fully combined.
  • Add flax/water, yeast/hone/waterr mixture, flour, oats, gum, salt, baking powder in mixer bowl and whip for 3 to 4 minutes.   
  • Place in an oiled 9 x 5 (standard meatloaf sized) baking pan.
  • Place in oven that was previously preheated to 170 degrees to rise.
  • Alow to rise for 35 to 45 minutes.  Bread when ready to bake will be about 1/2 to 3/4's inch over the top of the of the bread pan.
  • While pan is still in oven, turn oven on to 350 degrees. 
  • Set timer for 1 hour. 
  • After baking, take bread immediately out of the pan and onto a cooling rack to cool.
  • Once bread reaches room temperature, slice and enjoy!
Pureed Oats before adding to bread

reade more... Résuméabuiyad

Gluten Free Cheese Batter Bread


Only the best stuff on earth. OK so I stole that slogan. This bread really is VERY good. I don't know if many of you realize this but we really don't eat much bread around here. That is mainly how I can get away with a purely starchy mix of flour to begin with. So imagine my shock when I realized that the whole loaf was gone by dinner's end. It was that good!!! In fact, it smelled so good in the oven that we started breaking bits off while it was still baking. LOL. I think you should toy with this recipe and add more seasonings.  If you did not have young kids like me, you may even get away Fresh garlic maybe?  Every time we have an Italian meal from this moment forward, I will not longer feel sorry that I can't seem to master a good bread stick.


3/4 to 1 cup cup Warm Water (105 to 110 degrees)
2 Tablespoons Oil
2 Tablespoons Sugar
2 1/2 teaspoons Yeast
2 egg whites
1 whole egg
1/2 teaspoon Vinegar
1 teaspoon Salt
1 teaspoon Baking Powder
2 teaspoons Xanthan Gum
1 cup Tapioca Starch
3/4 cups Brown Rice Flour
1/4 cup Potato Starch
1 1/2 cup Grated Sharp Cheddar

Preheat oven to 170 degrees. Once preheated turn oven off.
Lightly grease an 8 x 4 bread pan.Aqq

  • Add 3/4's Water, 1 tablespoon Sugar, Yeast into a small bowl or measuring cup.  Fill additional water to make a total of 1 cup.   Mix until combined.
  • Allow water to sit while yeast starts to get foamy.
  • Meanwhile, add Egg Whites and 1 tablespoon sugar into the mixing bowl.  Whip for approximately 1 minute or until it develops a soft peak.
  • Next add whole egg and fully incorporate.
  • Add Oil, Vinegar, Xanthan Gum, Salt, Baking Powder and Flours in mixer with whip attachment and whip for 3 or 4 minutes.
  • Gently fold in cheese. Pour into 8x4 baking pan. Use oiled hands to smooth over top if a pretty top is desired.
  • Place in warmed oven to rise about 1 hour (I warm my oven to 170 degrees and then turn oven off).  Allow to rise only until just slight above top of baking pan.  This will take anywhere from 35 minutes to 1 hour.  Keep checking.
  • Once fully risen, keeping dough in the oven, turn oven on to 350 degrees and set timer for 70 minutes. (This is NOT a typo. I have come to learn that the longer baking time helps the bread not to collapse.)
  • Take out of the oven and out of the pan and let rest on cooling rack onto bread is room temperature.
  • Slice with electric knife and freeze what you will not need immediately.

Notes:
  • Rise time is approximate. In rising, bread should not rise beyond just slightly above top of the pan.
  • Don't rush the cooling step, it needs to cool properly or you will squash the bread.
    I will be linking this to:
    Slightly indulgent Tuesday at Simply Sugar and Gluten Free

    reade more... Résuméabuiyad

    Udi's White Bread Copycat Recipe


    This recipe and its ingredients were based on the Udi's bread available on the market back in 2010. The packaging and ingredients have since change.  I did a stupid thing, tho. In trying to delete a bread machine post (which folks were having way too much trouble with) I accidentally deleted the originally posted Udi's Copycat Recipe.  So if you are wondering why you are getting this again, this is why.  

    Anyhoo, the sole purpose of this experiment was to duplicate the super expensive bread I was traveling an hour into town to purchase at $6 a loaf.  Have I told you how tiny the town I live in is?  Besides that, I LOVE copycats!!!

    That said, the last time I was in town (prior to this experiment) I picked up a loaf and wrote down the ingredients according to how they were listed on the package. Since ingredients are placed in order by heaviest weight first, that is where I started. Next I did a google search to see if I could find any other bread making tips. I found some of the information and ideas I used in this experiment here.

    I measured the Udi's brand bread. It was 3 inches wide by 4 inches tall by 8 inches long. So one would assume that the pan should be an 8 x 3 pan. My end result weighed 16 oz so too heavy. Next step was the taste comparison.  I ate a whole slice of each bread trying to determine if the taste was the same. I think its pretty close. It turned out to be a very nice light white loaf of bread. It was not gummy at all nor crumbly. I think it should have risen a bit more so I may work on that as well.


    1 cup (120 g) Tapioca Starch
    3/4 (119 g) cup Brown Rice Flour
    1/4 (48g) cup Potato Starch
    2 Tablespoons Olive Oil
    3 Egg Whites
    2 Tablespoons Sugar
    1 package (2 1/2 tea) Rapid Rise Yeast
    2 teaspoon Xanthan Gum
    1 teaspoon Salt
    1 teaspoon Baking Powder
    1/2 teaspoon cider vinegar
    3/4 cup Warm Water

    Preheat oven to 170 degrees. Once preheated turn oven off.
    Lightly grease an 8 x 4 bread pan.
    • Add Water, Oil, Sugar, and Yeast into a small bowl or measuring cup and mix until combined.
    • Allow water mixture to sit and allow yeast to become foamy.
    • Meanwhile, with whip attachment on your stand mixer, whip egg whites for approximately 1 minute or until it develops a soft peak.
    • While those two are working, add Gum, Salt, Baking Powder and flours into a small bowl and mix until fully combined.
    • Add vinegar, yeast/water mixture and flours in stand mixer with whipped egg and whip for 3 or 4 minutes.
    • Scoop batter into your 8 x 3 baking pan and smooth top with your wet hands.
    • Place pan into the warmed oven and allow to rise for about 1 hour (I warm my oven to 170 degrees and then turn oven off)
    • When bread is finished rising it will be only slightly above the top of the baking pan.
    • When rising is finished, with bread dough still in the oven, turn oven on to 350 degrees and set timer for 70 minutes.
    • Take bread out of the oven and out of the pan. Let bread rest on cooling rack until bread is room temperature.
    • Slice with electric knife and freeze what you will not need immediately.
    Notes:
    • Rise time is approximate.  In rising, bread should not rise beyond just slightly above top of the pan.
    • Don't rush the cooling step, it needs to cool properly or you will squash the bread height.
    • A special thank you to Stephanie McKenzie from Reading Your Lips who converted and experimented with gram weights on the flours/starches in this recipe.

    Udi's Copycat Recipe Experiment Take Two - This was an experiment using powdered eggs.


    My Udi's Copycat White Bread Recipe originally appeared on Extraordinary Life on 08/16/2010.  Please do not reprint this original recipe on your blog without permission!

    reade more... Résuméabuiyad

    Gluten Free Muffuletta Sandwich and Gluten Free Muffuletta Bread Recipe

    First off, how do you spell this?  Muffuletta or Muffaletta?  What exactly is a Muffuletta anyway? I had to ask myself this question because I never heard of it before.  I needed to figure it out soon because I need a Gluten Free one in under a weeks time.  So I started the way I start out anything....Google Search. In this search I discovered that Muffuletta is the signature sandwich of New Orleans. Wikipedia says that the Muffuletta originated in New Orleans, Louisiana and is a type of round Sicilian type sesame bread that could be compared to a submarine type sandwich.  The bread is made into a large round and somewhat flattened loaf with a sturdy texture and about 10 inches in diameter.  It is described as being somewhat similar to focaccia.  It needed to be sturdy because of the juicy olive spread that is served on it as a sandwich.

    OK, that is a good place to start.  I think I can muster up a loaf of this type. My mother is Sicilian after all and I do have one particular recipe that she says is similar to Sicilian bread.

    The Muffuletta bread is split and filled with sliced Provolone cheese, Genoa salami and Cappicola ham, topped with Olive Salad that includes olives, oregano, parsley, olive oil, red-wine vinegar, salt and pepper.  Sounds like an Italian hoagie to me.  Either that or a Antipasti served on a roll!  LOL.

    OK, so are you ready?  Lets get started.


    1/2 teaspoon Vinegar
    2 Eggs
    3/4 cup Warm Water (110 to 115 degrees)
    2 Tablespoons Oil
    2 Tablespoons Sugar
    2 1/2 teaspoons Yeast
    1 cup Tapioca Starch
    1/2 cup Brown Rice Flour
    1/2 cup Corn Starch
    2 Tablespoons Almond Meal
    2 teaspoons Xanthan Gum
    1 teaspoon Salt
    1 Egg (for egg wash)
    2 Tablespoons Water (for egg wash)
    2-3 Tablespoons of Sesame Seeds
    I jar or recipe of Olive Spread Salad
    8 ounces thinly sliced Genoa salami
    8 ounces thinly sliced cooked ham
    8 ounces sliced mortadella
    8 ounces sliced mozzarella cheese
    8 ounces sliced provolone cheese

    Preheat oven to 170 degrees and turn off.
    Line Pizza pan with Parchment Paper sprayed with oil.

    • Combine Warm Water, Oil, Sugar and Yeast and allow to sit and become fluffy.
    • Meanwhile add eggs and vinegar to your stand mixer with whip attached and beat eggs until light and foamy.
    • Gradually add Flour, Almond Meal, Gum and Salt to mixer bowl until all is incorporated.
    • Next add the fluffy yeast/liquid mixture.  Scrape sides down as needed.
    • Allow to mix on low for a few minutes until the texture of the batter starts to look like whipped cream cheese.
    • Line a flat pizza pan with parchment and generously spray with oil and turn dough out onto pan.
    • With your oiled hands, shape dough into a flat round disk about 9 inches across (it will rise and expand to be about 10").
    • Sprinkle the top of your loaf with 2-3 tablespoons of sesame seeds and lightly press them into the dough.  I Omit this part, my kids would not eat it with sesame's on top.
    • Place shaped loaf into warmed oven to rise for 45 to 60 minutes, until doubled in size.
    • Take dough out of oven from rising and coat with egg wash (egg and water mixed throughly).
    • Place baking stone inside oven and turn Oven on to 350 degrees.
    • Once oven and stone are preheated, gently slide the loaf and parchment over on top of your peel. 
    • Place loaf directly onto hot stone inside oven (you will want the dough/parchment to be directly on the stone).
    • Bake for 25-30 minutes.


    reade more... Résuméabuiyad

    Gluten Free Philadelphia Style Soft Pretzels

    OK, so the picture is not of a dark pretzel.  I was eager to eat it, OK?  LOL.  It was so good!  It was so soft inside and had that famous pretzel texture and taste.  I have no intentions of sugar coating this for you. The rolling and twisting part is ten times harder than working with wheat flour.  I know that picture in my rolls post makes it look easy, but this is still sticky dough. If you are a Philadelphian born and raised like me, you will find it worth the effort.  This recipe is a keeper, hide it in your stash. :-)


    3/4 cup Warm Water (110 to 115 degrees)
    2 Tablespoons Oil
    2 Tablespoons Sugar
    2 1/4 teaspoon Rapid Yeast
    3 Egg Whites
    1 cup Tapioca
    3/4 cup Brown Rice Flour (super Fine)
    1/4 cup Potato Starch
    1/2 teaspoon Vinegar
    2 teaspoons Xanthan Gum
    1 teaspoon Salt
    1 teaspoon Baking Powder

    2/3 cup Baking Soda
    10 cups Boiling Hot Water
    1/4 Coarse Kosher Salt (topping)
    Melted Butter / Margarine  or Oil Spray

    Preheat oven to 450 degrees.
    Line baking sheets with parchment paper and lightly brush with oil.

    • Add Water, Oil, Sugar and Yeast into a small bowl or measuring cup and mix until combined.
    • Allow water to sit while yeast starts to get foamy.
    • Meanwhile, whip egg whites for approximately 1 minute or until it develops a Soft Peak.
    • Add vinegar, xanthan gum, salt, baking powder and flours in mixer with whip attachment and whip for 3 or 4 minutes.
    • In a Saute Pan or 8 quart sauce pan dissolve baking soda in hot water.
    • Once soda is throughly dissolved, bring water to a simmer.
    • Turn dough out onto an oiled surface and divide into 12 equal pieces.
    • With well oiled hands, roll each piece into a rope about 1/2 to 3/4 inch in diameter and twist into a pretzel shape and set aside on a baking sheet. (This is VERY challenging with the sticky dough and not for the faint of heart ~ LOL)
    • One at a time, place pretzel on a large slotted spatula and dip each pretzel into the simmering baking soda solution.  Simmer for 30 seconds or until pretzel looks slightly puffy (see picture).
    • Place on a greased baking sheet.  
    • Using pastry brush add butter/margarine or spray with oil and sprinkle with kosher salt.
    • Bake in preheated oven for 10-15 minutes, until browned.
    This is what the pretzel looks like just out of the Water.

    reade more... Résuméabuiyad

    Gluten Free Rolls, Gluten Free Hamburger Buns

    Whether its Sandwich rolls or Hamburger Buns you need, this recipe fits the bill.  I worked on the method and finally mastered a good Gluten Free Roll.  My Celiac child likes it, my regular diet son likes it and actually prefers it over store bought rolls.  How did I come across this wonderful awesome discovery?  Well it is the same recipe as that Udi's copycat white bread that I make.  A commenter on that post (Monica) suggested that it would make a good roll.  You know, I had gotten so used to making my rolls from the Pamela's mix that I never thought to make it into a roll.

    I have experimented with this recipe and have two different variations to offer you.   First is the softer crust roll that is good for Hamburgers and the second is a nice replacement Kaiser roll for a submarine sandwich.  Both have a lovely soft fluffy interior.


    Preheat oven to 170 degrees.  Once preheated turn oven off.  
    Lightly grease a Hamburger Bun pan Large Muffin Top Pan.

    • Add Water, Oil, Sugar and Yeast into a small bowl or measuring cup and mix until combined.
    • Allow water to sit while yeast starts to get foamy.
    • Meanwhile, whip egg whites for approximately 1 minute or until it develops a Soft Peak.
    • Add vinegar, xanthan gum, salt, baking powder and flours in mixer with whip attachment and whip for 3 or 4 minutes.


    Scoop out slightly heaping 1/4 cup worth of Dough.

    Roll dough meatball style with your oiled hands.
    This helps dough look more round.

    Flatten dough into reservoir to fill up space completely.


    Set dough into warmed oven to rise {30 minutes}
    Finished risen roll will look like this.


    With Cornstarch Added.
    Result is a softer crust,
    great for Hamburgers
    Regular Flour Blend only.
    Crust is crunchy and
    has a hollow sound
    when you knock on it.
    Great for Sandwiches


    • With Risen rolls in oven, turn oven on to 350 degrees.
    • Bake 30 minutes.
    • Allow to come to room temperature.


    Check out my Udi's copycat White Bread Recipe Post.


    Click here to find my Gluten Free Flour blend.


    Slightly Indulgent Tuesday
    Tempt my Tummy Tuesday
    Tasty Tuesday at Balancing Beauty and Bedlam
    Delicious Dishes
    Works for Me Wednesday
    Gluten Free Wednesday
    Full Plate Thursday at Miz Helens Country Cottage
    Ultimate Recipe Swap at Life as Mom
    Foodie Friday by Designs by Gollum


    reade more... Résuméabuiyad

    Sweet Potato Biscuits

    I have out my 1996 Thanksgiving Cooking notes.  That year I served Sweet Potato Biscuits for dinner and recall what a raging hit it was.  Even the cat enjoyed one for dinner!

    This is the actual recipe I used when I still used wheat.  That said, this recipe works with my gluten free flour blend as well.  I have included it below for you.  I was so pleased biting into this light and fluffy biscuit.  I never had much success in accomplishing a good Gluten Free Biscuit before this recipe.  I thought that those biscuit enjoying days were gone. Imagine my surprise when these turned out so well.  I think the Sweet Potato makes the difference here.  I like LOVE the idea of having the veggie hiding in my bread as well.  Enjoy them fresh and warm for the best experience.


    2 Large Sized Sweet Potatoes (about 1 1/4 pounds or 2 Cups)
    1 cup (2 sticks) butter, room temperature
      (I have also used 1/2 cup Margarine and 1/2 cup Shortening 
           as well as all shortening)
    1/2 cup Brown Sugar
    2 Eggs
    4 1/2 cups Gluten Free Flour Blend
    1 teaspoon Xanthan Gum
    2 Tablespoons Baking Powder
    1 1/2 teaspoon Salt
    1 teaspoon Baking Soda (make a diary
    1/2 teaspoon Cinnamon
    1 cup Buttermilk
      (Make it diary free by using a few teaspoons of vinegar or 
          Lemon Juice with alt. milks such as Soy, Rice or Almond)


    Preheat oven to 400 degrees.  Pierce potatoes in severa places.  Bake until very tender, about 1 hour.
    Cut potatoes in half and cool slightly.  Scoop flesh from potatoes into small bowl and cool completely.  Reduce oven to 375 degrees.

    Place 2 cups sweet potatoes into large bowl (save any remaining sweet potato for another use).  Add butter and brown sugar.  Beat until smooth.  Add Eggs and whip for a minute.  Sift flour, baking powder, salt, baking soda and cinnamon into medium bowl.  Mix dry ingredients into sweet potato mixture alternately with buttermilk in 3 additions, beginning and ending with dry ingredients.

    Transfer dough to generously floured surface lined with parchment paper. Roll to 3/4 inch thickness.  Using 2 1/4 inch round cutter, cut out biscuits.  Arrange on baking sheet allowing sides to touch.  Gather scraps into ball.  Re-roll to 3/4 inch thickness.  Cut out additional biscuits.

    Bake biscuits until golden puffed, about 25 to 30 minutes.  Transfer baking sheet to rack and cool.


      reade more... Résuméabuiyad

      My UDI's Bread Copycat Recipe Rises to the Challenge

      Just take a look at the risen height of this bread recipe.  Just awesome!  My mom is down for a visit and she had the chance to taste this bread.  Her opinion, "Its great".  She was skeptical at first.  No way she would eat the gluten free stuff.  She will never know how many bad batches I had to endure to get here.


      You can find my recipes at the links below:

      reade more... Résuméabuiyad

      Gluten Free Asiago Cheese Bagels

      My daughter and I going about our morning like usual when we noticed another individual enjoying a bagel.  We both immediately needed one.  I must admit the idea of making bagels intimidated me.  I used to watch my wonderful aunt make them when I was a child and recall thinking how overwhelming the whole process seemed.  But I had read another blogger mommy's post and how she made them.  I thought, I must try.  And so we did.

      Back in my Gluten filled days, Asiago Cheese were my favorite kind.  I just so happen to have some of this cheese on hand so I felt it was fate.  The flour I had on hand, Pamela's bread mix of course.  I love this mix and always have it around.  I'll repost Pamela's instructions for keep sake.  My hope is that my daughter will be able to come back to this site and find all the items I have mastered over the years.


      This is too much work to do for just 6 bagels so I'm doubling it.  Makes 12 Bagels.  Slice and Freeze what you do not eat immediately.

      7 cups Pamela's Bread/Flour Mix
      2 yeast packets or 4-1/2 teaspoons (fast acting)
      2-2/3 cup Warm Water (110 degrees)
      1/2 cup Oil
      1 cup cheese in mix and remaining for top

      • Preheat oven to 400 degrees.
      • Using a heavy duty stand mixer with whisk attachment combine flour, yeast, oil, cheese and water.
      • Mix on medium for 3 minutes.
      • Using a greased 1/2 measuring cup scoop out dough for each bagel and place on greased baking sheet.

      • Oil up your hands and smooth out the dough and form round bagel shapes.   

      • Poke hole in the middle with your fingers and allow to rest for one hour.

      • I find its best to not go any wider than the 1/2 measuring cup as gluten free bread items expand out and not up. For that reason I like to use my muffin top pan to try and control the expansion width.

      • Boil about 8 cups of water in a pot.  Boil 2 bagels at at time for 25 seconds each.

      • Remove with slotted spoon and place on greased baking sheet.
      • Top remaining cheese on each bagel.
      • Bake for 20 to 25 minutes.  I find two pans need 25 minutes but one pan needs 20.  Your oven may vary.


      For Freshly Baked Morning Bagels:
      Prepare dough, shape bagels on greased baking sheet.  Poke a hole in center of each bagel.  Cover and refrigerate overnight.  Bagels will rise while in refrigerator.  In the morning boil for 25 seconds each and bake at 400 degrees for 25 to 30 minutes.

      reade more... Résuméabuiyad

      Gluten Free Bread Recipe, Crusty French Bread, Bread Machine

      Oh, sweet mystery of life at last I found you......

      Ok a bit dramatic.  But man oh man am I excited.  Do you know how hard I've tried to make good gluten free bread?  How many different recipes and exotic flour combinations I've tried?  So many times I followed a recipe with great reviews only to achieve dismal results.  Its been a long and disappointing road.  I have no idea what kept me going.  But this last recipe I hit pay dirt.  I'm just so excited.  Real bread!!!

      I'm in love with this recipe.  The bread is soft, not sticky, it has a crispy French Bread sort of crust.  Just exactly as I remember a good loaf of Crusty French Bread to be.  From now on this will be formed into a baguette and be used whenever I desire this type of loaf.

      Oh, and this picture here happens to be out of the bread machine so its good for that too!!!


      1 cup Brown Rice Flour
      1 cup Tapioca Starch
      1/2 cup Sorghum Flour
      3 teaspoons Xanthan Gum
      1 teaspoon Salt

      1-1/2 cup Warm Water
      1 packet (2 1/4 teaspoons) Fast Acting Yeast
      2 Tablespoons Sugar

      2 Tablespoons Olive Oil
      3 Egg Whites (slightly beaten)
      1 teaspoon Vinegar


      In a medium bowl mix first group of ingredients until well combined.

      In a measuring cup, combine second group of ingredients.  Leave sit for a few seconds until it starts to proof.

      Combine third group of ingredients and whisk together lightly.

      Meanwhile place pan and paddles inside machine.  Set machine for quick cycle.
         or see below.

      Add all wet ingredients into bottom of bread machine.

      Add dry ingredients to top and start machine.

      **************
      Alternatively:
      1. Combine second set of ingredients and let sit to proof.
      2. Combine third set of ingredients into stand mixer with whip attachment.
      3. Allow to whip for 3 minutes.
      4. Add third set of ingredients and allow to whip and combine for 3 additional minutes.
      5. Pour batter into baking pan and cover with plastic wrap and a towel.
      6. Allow to rise for one hour.  
      7. Bake at 350 degrees for 70 minutes.
      **************

      A few key notes.
      • The first mixing you will need a spatula to scrape down the sides. Second mixing for oven baked bread.
      • Dough will be loose and sticky to the touch but not so soft that the dough does not form around the paddles.  See photo for what it should look like. Applies for both methods.  

      • Too wet a batter will cause rise and then eventual fall of completed loaf.
      • Too dry a batter will cause dense, unrisen and crumbly loaf.
      • Whipped eggs make the dough lighter and fluffier.
      reade more... Résuméabuiyad