Pages

.


.


Showing posts with label dinners. Show all posts

Easy Turkey Chili, a kid friendly recipe.

I am keeping it simple with this recipe.  This is a new twist on the Chili I traditionally make.  The addition of tomato paste and limiting the variety of spices and heat makes this a very kid friendly recipe.  My kids ate it and had good comments afterward which is a big deal in this house.  My kids are VERY picky eaters but will eat anything with Turkey in it.  So with that in mind and with help of my friend's Alison's recipe for Chipotle Turkey Chili I took my Christmas Leftovers and made it into a repurposed leftover.  You can use all leftover turkey (3 cups diced) instead of the ground meat.  Next time you find those Turkey Cutlets on sale at the supermarket you may want to give this a try.


1 pound of Ground Turkey
2 cups diced turkey meat, diced pre-cooked or leftover

1 large Onion, diced
1 jar of roasted Red Pepper strips, roughly chopped
1 teaspoon Garlic, minced

1 Tablespoon Chili Powder
1 Tablespoon Cumin
1/4 teaspoon Black Pepper

2 cans Chili Beans
14.5 ounce Can Petite Diced Tomatoes
1 6-ounce can Tomato Paste
1 cup Water

Toppping: Sour Cream

Brown ground meat in a hot skillet until no longer pink.
Add browned ground meat and remaining ingredients into a crock pot.
Cook 4 hours on high or 8 hours on low.
reade more... Résuméabuiyad

Gluten Free Fettuccine Alfredo with Mushrooms and Broccoli

This dish is traditionally pasta, cheese and butter.  Any mother of young children will know why the Italians started with a dish like this.  Children love spaghetti with butter.  Add a tad of parmesan and they will gobble it up.  History does not say that kids were the original reason but, as  mommy, I am positive kids had SOMETHING to do with it.   As we Americanized this dish over the years a touch of cream was added.  I'd venture a guess at saying it was to make this dish a tad bit more saucy.  Eventually a squeeze of fresh lemon. 

Now I am going to warn you. You are going to wrinkle your forehead and cock your eye at me when you see my "surprise" ingredent in this new twist on a traditional recipe.  This is the reaction my brother had anyway when he annonced that this was the best Fettuccine Alfredo he ever ate.  BUTTERMILK he says?!?!?!  I explained to him that I wanted it to be a tad bit more saucy and replaced the lemon with the tang of buttermilk.  Why not.  It sort of gives you the same tang that cream cheese would.  You have seen this cream cheese version before right?  I think the buttermilk gives it more depth of flavor.

Try it, you will like it! 

14 to 16 ounces Fettucini Noodles
      or Thai Kitchen Flat Noodles or Spaghetti    
6 tablespoons Butter
16 ounces Sliced Mushrooms
4 cloves fresh Garlic, chopped
1/2 teaspoon Salt
1/2 teaspoon Garlic Powder
1/2 teaspoon Onion Powder
1 Tablespoon Corn Starch
1/4 cup Water
1 pint Heavy Cream
1/4 cup buttermilk
3/4 cup Parmesan Cheese, Freshly Grated
1 bunch steamed broccoli (cooked)
  • In a large pot, add water and boil.
  • Add noodles and cook until just done.
  • Remove, rinse with hot water and drain.  Meanwhile...
  • Melt butter over medium heat in skillet.
  • Add mushrooms and garlic. Lightly sauté until cooked through.
  • Pour in pint of Heavy Cream and bring to just about simmer.  Steam will rise from the mixture but it will not boil.
  • Add salt, garlic and onion powder.  Stir in to fully incorporate.
  • In a small cup add water and corn starch and water,  Mix to dissolve corn starch.  Pour into cream.
  • Add buttermilk and stir until sauce just starts to simmer.  
  • Stir in cheese until melted.
  • Steam Broccoli in microwave unti fully cooked and stil into dish with cooked noodles.
reade more... Résuméabuiyad

Gluten Free Pot Stickers


The basis of this filling is Use Real Butter's Pot Sticker filling. I made mine a tad bit more americanized by using regular cabbage and button mushrooms.  I also left out some of the more traditional ingredients.  If you want to make the real deal, see the link below and head on over there for the most superior photo instruction tutorial on the web for making Pot Stickers and Dumplings.  This recipe is close enough to the real thing to make us happy!

The main purpose of my blog is to create gluten free copycats of recipes we used to enjoy ~ with ingredients that can be found locally. Because this is my mission, my version of this recipe had to be made americanized ;-). The closest town is about 1 hour away and I am not about to drive one hour for bamboo shoots or what have you...LOL. The filling for these dumplings smell wonderful and the taste is fantastic.  The dumpling dough is the same gluten free recipe being shared across the blog world.  I am making it my own by using my own preferred flour blend.

Do not be intimidated by the idea of rolling these out.  Seriously, it is much easier to do than you think.


Dumpling Dough (makes 20 to 24)
2 cups Flour Blend
11/2 teaspoons Xanthan Gum
2 eggs and 6-8 Tablespoons Water

Dumpling Filling
1 pound Pork
1 cup Cabbage, finely shredded
1/4 cup Button Mushrooms, finely shredded
3 Scallions, finely chopped
3 cloves Garlic, minced
2 Tablespoons Corn Starch
1 teaspoon ground Ginger
3 teaspoons Gluten Free Soy (like LaChoy)
2 teaspoon Sesame Oil

  • Pulse pork chunks in a food processor until finely minced.
  • Place pork in a mixing bowl and add cabbage, mushrooms, garlic and scallions into food processor until finely chopped.
  • Add remaining ingredients into mixing bowl and mix with you hand like you are making a meatball.
  • Set aside.
Meanwhile
  • Add flour's and gum into food processor.  Give it a quick pulse to combine.
  • Add egg and water while pulsing.
  • Dough should form a ball around the blade.
  • Take dough out and turn out onto a oil sprayed piece of plastic wrap.
  • Roll dough out into a 2" in diameter snake on oiled plastic wrap.
  • Slice off 1-1/2 inch segments of dough and keep the rest covered with a wet paper towel
  • Flatten out segment and then roll into a 2 1/2 inch diameter circle (no need to be exact here).  I find using an oiled piece of plastic wrap and a oil sprayed wood rolling pin works best here.  I had no sticking problems at all (even without the extra flour).
  • Add slightly less than 1 tablespoon of filling into middle.
  • Moisten half of the dough circle and close to form a half moon.  (my pinching shut technique is really bad so you are on your own with that one! LOL)
  • Set aside on  a plate covered with a paper towel while you work on the rest.
  • Close to form a half moon.
  • Steam for 15 to 20 minutes.

reade more... Résuméabuiyad

Salisbury Steak with Brown Mushroom Gravy

As soon as the weather starts to have a cold feel to its morning air, I start to think of Salisbury Steak. Salisbury Steak is one of my fall favorites.  This recipe was created a very long time ago in the kitchen of our first tiny apartment.  Before internet even....if you can believe that...LOL..  My husband and I were newly married, very young and very poor.  Salisbury Steak was the item I ordered every time I went into a restaurant (right Alison?) so eventually trying to copy it was a given.  This is exactly how I originally made it based on what I always had in my pantry.  Don't you love items that depend on pantry staples?  Oats were very inexpensive and we always had them.  I used them in the meatloaf because that is how my hubby's mom did it, so why not the salisbury steak? Cross that with the fact that my mom loved to thicken everything with Corn Starch.  I love that it was originally created gluten free! :-D


Patties:
1 pound ground beef
1/4 teaspoon Garlic Powder
1/4 teaspoon Mustard Powder
1 egg
1/4 cup oat powder (I like using oats pureed, but you could sub for your choice of bread crumbs)
1/4 cup finely minced onions
1 Tablespoon L&P Worcestershire Sauce
1/4 teaspoon Salt
1/8 Black Pepper

Gravy:
2 Tablespoons Oil
1 large onion, sliced
8 ounces Mushrooms, sliced
2 cups or 1 can beef broth
     (Go ahead and use water/bouillon to make broth if you need to)
1/2 teaspoon Mustard Powder
1 pinch Cayenne
2 T Corn Starch w/ 2 T cold water (combined well)
2 teaspoons La Choy Soy Sauce
1 Tablespoon L&P Worcestershire Sauce
1 teaspoon Kitchen Bouquet Brown Gravy Seasoning
1 cube Herb Ox Beef bouillon

  • Add all patty ingredients and mix well. 
  • Form into 5 or 6 oval shaped patties. 
  • Add 2 tablespoons of oil to pan and brown patties on each side. 
  • Remove from pan and add onion and mushrooms. 
  • Cook until onions are translucent and mushrooms give some moisture. 
  • Add patties back to the pan and add remaining sauce ingredients 
  • Cook for 7 to 10 minutes on low, until patties are heated through and sauce is thickened.
reade more... Résuméabuiyad

Home Made Gluten Free Hawaiian Pizza

This is another one of my not really a recipe recipes.  Its more like a "way" of having something.  Does that make sense?  LOL.  Pineapple pizza was my hubby's favorite when we first met.  Probably still is only the kids would never allow the ONE pizza we buy to be a pineapple one.  That Domino's commercial with the preschoolers comes to mind.  Now that I make my own pizzas I make two, one for adults and one fir kids.


1 Gluten Free Pizza Crust Recipe
1 cup of Pizza Sauce
1 cup of thinly sliced and diced GF Ham Lunchmeat
1 8-ounce can of Pineapple Tidbits


Preheat oven to 350 degrees with pizza stone inside
Have your pizza peel ready
  • Prepare pizza crust according to directions in link provided (or use your favorite prepared crust)
  • Meanwhile, prepare pizza sauce (or use your favorite jarred variety, I hear Muir Glen Organic Canned Pizza Sauce is a great choice).
  • After crust is partially baked for 10 minutes, take crust out and spread sauce on top of pie shell (leaving a 1/2 inch rim).
  • Top with ham and pineapple, spread around evenly.
  • Top with Mozzarella Cheese.
  • Place back in 350 degree oven on pizza stone and bake for 10 more minutes.


reade more... Résuméabuiyad

Pizza Inn Taco Pizza Copycat Recipe

Pizza Inn Taco Pizza was our all time favorite back in the day.  You know, the days when eating wheat seemed OK.  Noticed I said seemed.....LOL.  On a whim (and on the day after Taco night with extra ingredients) I decided to look up what exactly was on that Pizza Inn pizza we loved so much.  There is a huge amount of variation in the way folks prepare this recipe and what I wanted was THEIR way.

According to Pizza Inn Menu: "Our Original Thin Crust topped with seasoned taco meat, Cheddar cheese, crispy lettuce, and fresh diced tomatoes."

I usually do just make this sometime after a taco dinner, making sure I make enough meat for leftovers. This way I have enough leftovers for ONE pizza.  It really does make sense to make two pizzas though if you are going to go though all the trouble of browning meat and such.  This would also be a good time considering cooking some of your ground beef ahead of time! ;-D


1 Gluten Free Pizza Crust Recipe
1 can Refried Beans (or about 1 cup of your own ~ heated until soft)
1/2 pound Ground Meat
1/2 packet of Taco Seasoning (Make your own or use Or McCormick)
Shredded Cheddar Cheese
Crispy Lettuce
Fresh Diced Tomatoes
A few dashes of Hot Sauce (Optional)


Preheat oven to 350 degrees with pizza stone inside
Have your pizza peel ready
  • Prepare crust according to directs included in link above or use your favorite prepared crust (like Udi's).
  • Brown ground beef in a skillet making sure to crumble meat. 
  • Drain fat, add water and taco seasoning. Set aside. 
  • After crust is partially baked for 10 minutes, take crust out and spread refried beans on top of pie shell (leaving a 1/2 inch rim).  I usually do a thin spread, just to taste so you may have some leftover.
  • Add crumbled ground meat on top evenly.
  • Bake in oven on top of pizza stone for 10-15 minutes or until ingredients on top are heated through.
  • Take out of the oven and top generously with cheddar cheese, lettuce and tomato.  
  • Serve with hot sauce and sour cream at the table.


I will be linking this recipe up to the following linky's:
Slightly Indulgent Tuesday over at Simply Sugar and Gluten Free
Mommy Solutions (Tuesday) at The Mommy Club
Gluten Free Wednesday over at Gluten Free Homemaker
Real Food Wednesday 
Works for me Wednesday
Creative Juices Thursday @ Momnivore's Dilemma
Potluck Friday @ Ekat's Kitchen

reade more... Résuméabuiyad

Vegetarian Fried Rice

Meatless Meals

I am not going to pretend that this is an Asian meal, it is not.  The only thing Asian about it is that it has Sesame oil it it, LOL.  I LOVE sesame Oil though.  Its very good and I just LOVE the smell the sesame oil gives this dish.   Go ahead and get yourself some rice paper wrappers and make some Spring rolls to go with it.  Its not that much more trouble, you already went though all the trouble to chop up all the veggies so why not?


2 Tablespoons Olive Oil
3 Tablespoons Sesame Oil
2 Eggs, beaten
1/2 cup Onion, chopped
1 Tablespoon Garlic, minced (about 2 cloves)
1 cup Carrots, shredded
1 cup Green Beans, French cup, chopped
1/2 cup Celery, chopped on the bias
2 cups dry rice, cooked to package directions
   (Jasmine would be lovely but I usually use long grain white/brown)
2 Tablespoons Soy Sauce (Make sure it's Gluten Free)

  • Heat a 14 inch deep skillet over high heat until a bead of water vaporizes in 1 to 2 seconds of contact.
  • Add 1 tablespoon of Sesame Oil and 1 tablespoon of Olive Oil into the pan.  
  • Add Eggs and scramble making sure you break the egg into very small bits.  Set aside.
  • Add 1 tablespoon of Sesame Oil and 1 tablespoon of olive oil into pan again.
  • Add Onion and Garlic.  Cook on high stirring often for about 1 minute.
  • Add 1 tablespoon of Sesame Oil and 1 tablespoon of olive oil into pan for a third time.
  • Add all the vegetables and stir fry over medium for 2-3 minutes.  
  • Add rice, egg and soy sauce.  Increase heat to medium-high and cook for 2-3 minutes, making sure to stir and break up rice.  

Recipe Adapted from "The Breath of a Wok" by Grace Young

reade more... Résuméabuiyad

Low Carb and Gluten Free Southern Fried Chicken

So long day dreams of KFC.  I found a new love and won't be needing you anymore.  

Anybody who knows me very well, knows I had no idea what southern fried chicken was growing up. I knew it was breaded with "flour".  I know that some folks (Food TV foodie here) would soak the chicken in butter milk.  Seasonings.  But the whole idea of how it came together was a total mystery to me.  Can you believe that this is my very first ever attempt to make Fried Chicken?  At my age?  

This is good.  VERY good. Very. Very. Good.  I daydream about it now.


3 pounds of Chicken (I'm using all Thighs)
1 cup Buttermilk

3 Eggs
1/4 cup Water
3 Tablespoons Hot Sauce

2 cups Hodgson Mill Soy flour

Mrs. Dash Table Blend
Salt
Black Pepper

3 to 6 cups Oil (depends on pot used)
  • Rinse and pat dry chicken parts.
  • Soak Chicken in buttermilk in a ziplock bag or a container with a lid and place it in the Refrigerator to marinade.  I like to do this part up in the morning so its ready at dinner prep time.  Should be a minimum of 12 hours but don't worry about it being exact.
  • In a medium sized soup bowl, beat eggs, water and hot sauce.
  • In another bowl add Soy flour.  
  • Generously sprinkle chicken with Salt, Pepper and Mrs. Dash
  • Dip the checken in Egg mixture.
  • Next dip chicken in Flour and shake off excess.  Set Aside.
  • Heat oil to 325 degrees. This is just before smoking temperature.
  • Fry chicken in oil (10 minutes per side).  Internal temperature should be 180 degrees.  It's dishes like this that make me happy to own an instant read thermometer.

Notes:
  • I'm using Soy Flour because of it's high Fiber and Protein content.  You could just as easily use Gluten Free Oat Flour or Brown Rice Flour.
  • I keep dried buttermilk in the pantry and that really comes in handy for a dish like this.
  • I would add 4 Tablespoons of Buttermilk Powder to a cup of Skim milk but water will do just as well.
  • Old "southern's" will say fry it till its golden brown. That just does not feel safe enough to me.  Go ahead and poke it with your instant read thermometer to double check.
reade more... Résuméabuiyad

Make your own boxed Hamburger Helper mix ahead of time and have Gluten Free Hamburger Helper Cheeseburger Macaroni ready when you need it....


Here I am again re-making the Copycat Hamburger Helper recipe I posted previously.  I am always trying to perfect the recipes I'm working on.  One of these days I will share how I work up a recipe idea.  If you went to Culinary Arts school they would tell you how to develop recipes.  I did not go to Culinary Arts school so I have my own crazy way of doing it.  

This version of home made Hamburger Helper is shelf stable and a replacement for the boxed mixes you purchase at the store.  My kids SWEAR that this version tastes better.  In fact they have asked me to make this every week so that means it rates right up there with Pizza and Hamburgers.  


1 pound Ground Beef (preferably pre cooked in your OAM cooking day)
1 cup Sharp Cheddar
3 cups Water
1/2 cup Milk

Spice Packet:
1 teaspoon Brown Rice Flour
1 T Corn Starch
2 Tablespoons Bouillon Powder (check the GF Status on this product)
1 T Chopped Onion (dried)
1 T Parsley
1 t Onion Powder
1/2 t Garlic Powder
1/2 t Paprika
1/2 t Sugar
1/4 t thyme

1 1/2 cups Elbow Pasta (I use Tinkyada)

The lineup

Add Spice Packet Blend to Snack Sized Ziploc

Add small ziploc along with pasta inside a bigger ziploc.

Stack and Store

  • Brown Ground Beef (Or take out a pre cooked batch from your freezer like I do)
  • Add Water, Milk, Pasta and Spice Packet into pan.
  • Turn heat on Medium Low and cook for 15 to 20 minutes (stirring occasionally) or until pasta is tender.
  • Add Cheese and mix well until melted.
  • Relax and Enjoy.
That was easy right.  Add, mix and enjoy.  Nothing to it and its home made.

reade more... Résuméabuiyad

Gluten Free Country Fried Steak with Cream Gravy

This recipe uses flour to dredge your steaks in.  You could easily use bread crumbs if you like but you really don't have to.  I don't usually have bread crumbs around since we generally eat all the bread I make from week to week.  I really like the idea of using Oat Flour anyway because of the added fiber it gives to the dish.  It sort of hides the fiber in there without any innocent victim suspecting it's good for them.  LOL.  I understand that some Celiacs don't tolerate Oats very well though.  Our family does not have a problem with them as long as they are certified Gluten Free.


1 cup Oil

1 Egg
3 tablespoons Water
1 to 2 cups Gluten Free Oat Flour (I use GF Oats and put into Food Processor) 

1 pound Beef Cubed Steak (I purchase mine already tenderized)
Season Salt
Freshly ground Black Pepper
1 1/2 to 2 cups Milk
2 tablespoons Brown Rice flour or Soy Flour

  • Heat the oil in a skillet, until it sizzles a little. 
  • Combine the Egg with 3 tablespoons Water in a shallow bowl.
  • Put 1 to 2 cups of the Oat Flour (or BR Flour) in another shallow bowl and season with salt and pepper. 
  • Season the Steak with season salt and pepper. 
  • Dredge the steaks in the flour, coating each piece evenly. 
  • Drip the steak in the egg wash. 
  • Dredge again in the flour. 
  • Fry the steaks in the hot oil, until golden brown on each side, about 3 minutes. 
  • Remove and drain on paper towels. 
  • Season with salt and pepper. 
  • Discard all but 1/4 cup of the oil from the fry pan. keeping some of the brown bits for the gravy is encouraged. 
  • Over medium heat, add 2 tablespoons brown rice flour and cook for 3 to 4 minutes, whisking constantly. Add the milk, a little at a time, whisking constantly until you reach desired consistency. Coating back of the spoon I believe is industry standard. 
  • Bring to a boil, then reduce the heat to medium-low. 
  • Season with salt and plenty of pepper. 
  • Cook for 5 to 8 minutes, whisking constantly. 

This recipe could easily be used for Cubed Pork Steaks too if you happen to find a good deal on those.

I shared this recipe with:
Ultimate Recipe Swap
Slightly Indulgent Tuesday
Gluten Free Wednesdays


reade more... Résuméabuiyad

Roasted Chicken

It seems almost ridiculous to post this recipe.  There is really not much to it.  But since the purpose of this blog started out as a way to keep track of the recipes I create and cook for my daughter's sake......she will be grateful when she gets older and has an organized place to find them.  So here it goes, how we bake our chicken around here.


1 package of Chicken Leg Quarters
Onion Powder
Garlic Powder
Salt
Pepper

Preheat oven to 350 degrees.
  • Wash and pat dry chicken legs
  • Place on a baking sheet.
  • Sprinkle seasonings generously.
  • Bake at 350 for one hour.
Note:
  • Chicken when done must read 165 degrees.
reade more... Résuméabuiyad

Gluten Free Chicken Casserole


The inspiration for this dish came in desperation.  We just came back from Community Clean-up and I was really very tired after spending all day out in the sun.  We all have those occasions, when even an energizer bunny type girl like me wears out.  It was 4:30, I still had not started dinner and family was starting to complain that they were "starved".

Casseroles are not a favorite of ours and I very rarely make them.  We liked this one because its cheesy.  What is not to love about Broccoli with Cheese?  I am betting that leaving out the cheese and using a chicken bouillon or two would be equally as good.  Mixing in some philly cooking creme would not be a bad idea either.  The point is that its quick and easy and done in under 30 minutes.  I am even layering in the frozen components in there still frozen.

Ok, are you ready?  Lets get started.

4 Tablespoons Butter
2 Tablespoons Brown Rice Flour
2 cups Milk
1/2 teaspoon Salt
1/4 teaspoon Pepper
2 cups Cheddar Cheese
1/2 teaspoon Dijon Mustard
1/4 cup Mayo
2 cups of Chicken Bits (I have a freezer stash but go ahead and used canned if you need to)
1 bag of Steamfresh Brown Rice (about 2 cups cooked)
1 17-ounce Family Sized Bag of Broccoli Florets
2 Slices Bread, placed in processor until crumb

Preheat oven to 350 degrees.

  • Melt butter in small saucepan.
  • Add flour, milk, salt, and pepper. 
  • Cook and stir until mixture thickens.
  • Add cheese and mix until combined.
  • Add mayo and mustard and mix well.
  • Layer cooked chicken inside a 9 x 13 greased casserole dish.
  • Layer brown rice.
  • Layer Broccoli.
  • Top with sauce.
  • Take freshly ground bread crumbs and top casserole.
  • Bake for 20 minutes.


Recipes similar to this one:

Chicken Scrumptious Casserole - Keith Dunlap
Chicken and Rice Casserole - Paula 

reade more... Résuméabuiyad

Simmered Pork Chops in a Brown Gravy Mushroom Sauce

We love Breaded pork chops at our house but the breading process can be so time consuming. This dish is company worthy and so easy to make. I love how hands free this recipe is.  Once the pork is browned and set to simmer you are free to spend time with your family while this masterpiece dish is created.  When the pork is done the juices it leaves behind makes an awesome quick gravy.


1 Tablespoon Olive Oil
4 1-inch thick boneless pork chops
1/2 cup Beef Stock
2 teaspoons Rosemary
1 teaspoon Pepper
1/2 teaspoon Salt
1 Tablespoon Olive Oil
2 cloves Garlic, minced
1 onion, roughly chopped
8 ounces sliced Mushrooms
1 teaspoon Soy Sauce
1 teaspoon Browning Sauce
1 teaspoon Worcestershire Sauce
1 Tablespoon Rice Flour (Or GF Bisquick)


  • Add olive oil to pan and allow to warm up.
  • Add Pork Chops and brown on each side.
  • Add stock, Rosemary, Salt and Pepper and cover.
  • Set on low heat and simmer for 45 minutes.
  • Meanwhile add Olive Oil and Onion into a medium sauté pan.
  • Cook on medium low until onions start to caramelize.
  • Add garlic and mushrooms. 
  • Cook until mushrooms start to release their liquid.    Adjust seasonings as needed.  I like to add more rosemary and salt but its not necessary.
  • Once pork chops are fork tender, take out of the pan and add to your serving plate.  
  • Add Flour, Soy, Browning Sauce and Worcestershire Sauce.
  • Whisk over medium heat until thickened.  
  • Add vegetable mixture.
  • Pour over Plated Pork.  
  • Serve and enjoy!

I this sauce is outstanding but would also be great with a Tablespoon of Red Wine and Dijon mustard!
reade more... Résuméabuiyad

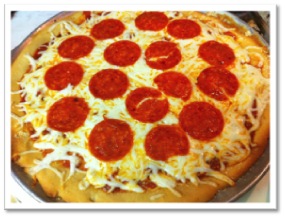
Gluten Free Pizza

It has been over a year now since I consciously ate wheat or gluten.  Pizza crust made with such ingredients is just a fading memory.  But if I close my eyes and try real hard, I can reminisce about what good pizza tasted like.  Cracker type bottom crust, soft yet chewy middle, delicious toppings of my choice.  It can't be all cracker, nor can it be all chewy.  It must be both.

I waited a full six months before I even attempted to make pizza at all.  The first one I attempted was made from Pamela's Bread mix. I must admit, I found it odd that you had to pre-bake the gluten free crust.  But I followed those directions exactly as it instructed. My daughter and I were so happy and full of delight with the final result.  My "wheat eaters" (I have 3 of them) were not so happy. They said it was gross.  Even my BIGGEST FAN, my mother, said something just was not right.  If this is what Gluten Free pizza has to taste like, you can count me out.  LOL.  Understand that this is HUGE deal with my mom who bends over backwards, I think, to be super positive about everything I do.  My daughter and I thought they were just being overly critical.  However, since I will not be making a crust with wheat in MY kitchen, I had to continue on with my search.

I have been trying out various pizza crust recipes and variations of my own for quite some time now.  With egg, without egg, all nutrient dense flours, all starches...I never seemed to find just the right one.  They all were good in their own right, but just not what I was looking for.  Today is the golden day in history that I figure out how to make my own awesomely good Gluten Free Pizza Crust.  From this moment forward, THIS is the way I will be making my pizzas.

The tapioca in the flour blend plays a key role, I think, in adding that chewy bite.  Too much of it though will make it powdery so Que in the Brown Rice Flour to weigh it down a bit.  This pizza actually is good the next day too.  We added some extra cheese and put it back in the oven on that stone for 10 minutes.  Crust was still crisp at the bottom and chewy in the middle.


1/2 teaspoon Vinegar
2 Eggs
============
3/4 cup Warm Water (110 to 115 degrees)
2 Tablespoons Oil
2 Tablespoons Sugar
2 1/2 teaspoons Yeast
============
2 Cups Flour Blend *
2 Tablespoons Almond Meal
2 teaspoons Xanthan Gum
1 teaspoon Salt
============
Your favorite Spaghetti Sauce
Mozzarella Cheese

Preheat oven to 170 degrees and turn off.
Line Pizza Stone with Parchment Paper sprayed with oil.

  • Add eggs and vinegar to your stand mixer with whip attached and beat eggs until light and foamy.
  • Meanwhile add Warm Water, Oil, Sugar and Yeast and allow to sit and become fluffy.
  • Add Flour, Almond Meal, Gum and Salt to mixer bowl.
  • Next add the yeast/liquid mixtures.
  • Allow to mix for a few minutes until the texture of the batter starts to look like whipped cream cheese.
  • To shape the pizza, line a pizza pan with parchment and generously spray with oil. Spread dough out with your oiled hands.
  • Place dough into warmed oven to rise for 30 minutes.
  • Take dough out of oven, place baking stone inside oven and turn Oven on to 350 degrees.
  • Once oven and stone are preheated, place Pizza crust with parchment inside oven directly on top of your stone. 
  • Bake for 15 minutes.
  • Using your peel, take your pizza crust out of the oven and add your sauce and cheese.
  • Place pizza carefully back onto hot stone inside oven (you will want the dough/parchment to be directly on the stone).
  • Bake for an additional 10 minutes.

I know this recipe is probably asking for items you may not have (stone, peel) but I find that the stone is absolutely necessary in making a gluten free crust.  The stone allows the bottom to crisp and brown while keeping the middle soft and chewy.  I purchased both of these items (stone, peel) at Target for $10.

Note: 
Not all Pepperoni is Gluten Free.  Please call if you are not sure.  Last pepperoni I fead my daughter caused her to develop blisters in her mouth and down her throat.  The label seemed safe, but it was not.

* My Preferred Gluten Free Flour Blend:
1 cup Tapioca Starch
3/4 cup Brown Rice Flour
1/4 cup Potato Starch

Make Ahead Note:
This Pizza crust can be made ahead and frozen.  After the first 15 minutes of baking, cool on a wire rack, wrap and freeze.  Allow pizza crust to thaw to room temperature and dress pizza and bake as instructed above.

To Use:
Preheat oven and stone to 350 degrees. Allow crust to thaw at room temperature and add your topping.  Bake in the oven for 10 minutes.

I will be linking this recipe to Gluten Free Homemaker's Gluten Free Wednesdays.
reade more... Résuméabuiyad

Chicken Pot Pie

My kids actually like this dish but eat it without the crust.  I must admit, I am very pleased at how easy it is to make and how nicely it turns out.  I like to break up the crust and mix it in.  Yum!


1/3 cup Butter
1/4 cup all-purpose Flour
2 cups Chicken Broth
1 cup Half-and-Half (have used regular milk with good results)
1 bag of mixed veggies, defrosted
    (alternatively 1 cup each: potato, onion, celery, carrot - diced and cooked)
1 teaspoon Salt
1/4 teaspoon Pepper
2 cups cooked diced Chicken, cooked
Pie Crust (store bought or your own recipe)

  • Preheat oven to 400 degrees.
  • Melt Butter in 2 quart pot.
  • Add Flour, Broth and Milk. Cook over medium heat, stirring constantly, until thick and bubbly.
  • Stir in Salt and Pepper, Vegetable mixture and and Chicken
  • Continue to cook until heated through.
  • Pour into 2 quart casserole dish. Top with pie shell. Cut slits to allow steam to escape.
  • Bake for 40 minutes until pastry is golden brown and filling is bubbly and cooked through.
reade more... Résuméabuiyad

Leftover Ham Tetrazzini

I am trying to figure out ways to use up all my leftover ham from Christmas.  So Voila, a new twist on an old classic.  It turned out VERY good!  Definitely will be making this dish again.


1 Tablespoon Butter
1/2 Onion, finely chopped
8 ounces Mushrooms, sliced
1 can Progresso Cream of Mushroom Soup
3/4 cup Stock, Ham if you have it leftover
1/4 cup White Wine (I use Holland House)
2 cups Colby Cheese, shredded
1 cup Corn
1 cup Cooked Ham, diced
1/2 pound Fettuccine Noodles

  • Bring a large pot of water to a boil. Add pasta and cook until al dente; drain.
  • In a large saucepan over medium-high heat, sauté onions, mushrooms and garlic in butter until tender.
  • Stir in cream of mushroom soup, broth, wine and shredded cheese. Heat mixture until cheese melts, stirring often.
  • Add ham, corn, cooked and drained pasta and stir to combine.
  • Stir until heated through and serve.
reade more... Résuméabuiyad

Quick and Easy Gluten Free Chicken Spaghetti Dinner

When my brother first tried this dish, he went right over to his place and bragged about it to his friends. He was telling them how creative I am.  Well I wish that were the case but I first tried this dish at a Church dinner.  I noticed that my son enjoyed it and he is just so incredibly picky that I thought to myself, "I must try it gluten free".  It makes a generous sized casserole and results in plenty of leftovers.  At least it does for my family.


3 to 4 chicken pieces
Water to cover
1 Herb Ox Bouillon Cube
1 (18 ounce) can Progresso cream of mushroom soup
1  cup Sharp Cheddar Cheese
1 (16 ounce) can Rotel Tomatoes (drained)
1 small Onion, finely diced (1/4 cup)
1 small Pepper, finely diced (1/4 cup) ~ Optional
1 (12 ounce) package spaghetti noodles
1 cups Reserved Chicken Broth From Pot
1 teaspoon Mrs. Dash
⅛ teaspoons (to 1/4 Teaspoon) Cayenne Pepper
Salt And Pepper, to taste

*1 cup Additional Grated Sharp Cheddar Cheese (for topping if desired)*

  • Place a large pot of water on to boil. 
  • Add chicken pieces into the pot and cook until done, approximately 35 to 40 minutes. Internal temperature of chicken should be 165 degrees. 
  • Remove 1 cup of stock and add Bouillon Cube. Keep the remaining stock on simmer.
  • Making sure chicken is cool enough to handle, pick out the meat to make two full cups of meat. 
  • Add broken spaghetti into the chicken broth and simmer until al dente. Do not overcook, especially with GF pasta. 
  • When spaghetti is cooked, drain out broth.
  • Combine with remaining ingredients (including 1 cup stock) and 1 cup sharp cheddar.
  • Bake at 350 degrees for 35 to 45 minutes.
reade more... Résuméabuiyad

Copycat Hamburger Helper Cheeseburger Macaroni

I have been making a variation of this for a long time now.  Don't get me wrong, I completely appreciated Hamburger Helper when I worked out of the house.  But this recipe is just as simple.  It also makes plenty so expect leftovers.  Whenever I have leftovers from dinner, I make up a leftover lunch for the hubs.  Whenever I have a selection of leftovers to choose from, he chooses this!!

It looks lengthy I know. I find it is still very easy to make. I just take out all my ingredients, start the noodles and the work on the beef/gravy.  It is a creamy, beefy and cheesy blend that is sure to satisfy!


16 ounce package of Elbows
A pot of Warm Water

1 Pound of Ground Beef
1 Large Onion
2 cloves of Garlic
1 Tablespoon Olive Oil

1 cup Swanson Beef Stock or Kitchen Basics Beef Broth
1 teaspoon Kitchen Bouquet (called to verify GF Status)
1 tablespoon La Choy Soy (Kroger Soy Sauce is also GF)
1/2 teaspoon Mrs. Dash all purpose spice blend
1/2 teaspoon Salt
1/2 teaspoon Garlic Powder
1/8 teaspoon black Pepper
1 Herb Ox Bouillon Cube (chicken)
3 Tablespoons Flour (I have used Bisquick or Rice)

1 12-13 ounce can evaporated Milk
2 cups Shredded Extra Sharp Cheese

  • Put on a large pot of water to boil.
  • Add Elbow Macaroni Noodles and cook according to package directions.
  • In a separate deep sided skillet, add oil, beef, garlic and onion.  
  • Cook until beef is no longer pink and onions are translucent.
  • Add next group of ingredients.
  • Simmer and stir for 5 to 7 minutes until sauce thickens. 
  • Meanwhile, drain cooked noodles (reserving one cup of pasta water).
  • Add water and noodles to simmering beef.
  • Stir in milk and cheese until cheese is melted.


  • Tempt my Tummy Tuesday


  • Tuesdays at the Table


  • Tasty Tuesday at Balancing Beauty and Bedlam


  • Tasty Tuesdays at a Beautiful Mess


  • Tasty Tuesday at Dr. Laura's


  • Delicious Dishes


  • Slightly Indulgent Tuesday


  • Hearth and Soul


  • Tuesday Night Supper Club


  • Works for me Wednesday


  • What's on the Menu Wednesday


  • Gluten Free Wednesday


  • Pennywise Platter Thursday


  • Recipe Swap Thursday


  • Ultimate Recipe Swap


  • Foodie Friday


  • Food on Fridays
  • reade more... Résuméabuiyad

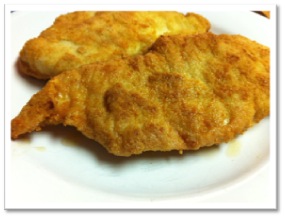
    Oatmeal Parmesan Crusted Chicken Cutlets

    This is my children's favorite dinner.  I found a recipe once that suggested adding Oatmeal to the breading for your fried chicken.  I already use Oats in my meatloaf, why not this?  So we gave it a try.  You know what?  We never really missed the breadcrumbs.  So here it is, my new favorite breaded Chicken Recipe.


    1 cup Oats
    3/4 cup grated Parmesan cheese
    1 teaspoon chopped fresh thyme
    1/2 teaspoon salt
    1/4 teaspoon freshly ground black pepper
    1 pound chicken breast tenders
    1 Egg, Beaten ( then place in shallow bowl)


    • Preheat 1 inch of Olive Oil in a fry pan to warm up.
    • Place oats in a food processor, and process for 20 seconds or until coarsely ground to fine powder (depending on your preference).
    • Add parmesan cheese, thyme, salt, and pepper. Pulse to combine, and place in a shallow bowl.
    • Dredge chicken in Egg and then in oat mixture.
    • Place tenders in frying oil and bake for 2 to 3 minutes on each side or until browned.

    I will be sharing this with the following blogs:
    reade more... Résuméabuiyad

    Gluten Free Sweet and Sour Chicken

    Sweet and Sour Chicken Recipe

    I never attempted to make this sort of recipe before.  It was always one of those things that we saved to order at Restaurants.  Lately though, is very rare that we go out to a restaurant, so I decided to give this a try.  It was so incredibly good.  I would recommend you play around the the water content to adjust the thickness to suite your preference.  Some like it saucy, some want the chicken to appear glazed.    I think this recipe is a spring board for all the other variations of this dish (Orange, sesame, etc). Next I think I would like to try it with Orange Juice and some red pepper flakes and make it into Orange Chicken.


    2 pounds boneless, skinless chicken breast (diced, bite sized)
    1 cup Flour, any (I used GF Bisquick or Pamelas)
    1 teaspoon Ginger
    1/4 teaspoon Cayenne
    2 teaspoons Garlic Powder
    2 teaspoons Onion Powder
    1/2 cup Oil

    2/3 cup Sugar
    2 Tablespoons Cornstarch
    3 teaspoons Vinegar
    1 1/2 to 2 cups Water
    2 Tablespoons Soy Sauce (La Choy)
    3 tablespoons Ketchup (Hunts no HFCS)
    8 ounces Pineapple Chunks

    • In a dish or ziploc baggie, mix flour, ginger, pepper, garlic salt, onion powder, and seasoned salt.
    • Add chicken pieces and toss to coat.
    • In a large skillet, heat oil over medium heat.
    • Drop in floured chicken, and fry until chicken is browned and fully cooked.
    • Drain on paper towels.
    • In large saucepan, whisk sugar, cornstarch, vinegar, water, soy sauce, and ketchup.
    • Turn on medium heat and stir until mixture boils (stir constantly to avoid lumps).
    • When mixture is thickened, add chicken pieces and toss to coat.
    • Serve chicken and sauce over hot rice or carb of your choice

    I will be posting this recipe to:

    reade more... Résuméabuiyad